Overview
I had been running OctoPrint on a small embedded PC that I had, but it was not running as well as I would have liked. This original build was kinda slapped together and not quite as streamlined as I had intended it to be. It worked, mostly, but wasn’t running OctoPrint as a service, and required a manual start of the webcam software on reboot, so just kinda meh.
I decided to kick it up a notch with a more powerful embedded PC that I had laying around, with more disk space, RAM and processing power. Not that the other unit was under-powered (I mean you can run this on a Pi), but I had the hardware, so why not?! Here is how it all went together, for posterity, and for anyone else looking to do this. I will list the sources that I followed at the end of the post.
This guide assumes that you have some familiarity with working in command line LINUX. If you don’t, google may be your friend. Additionally, anywhere you see me use either my username “alex” or “[USER]” you should replace that with your user name.
Install the OS
First off, I started with a fresh download of Ubuntu Server 20.04 LTS. You can download that right from the Ubuntu Site. I use Balena Etcher to write out my live USB stick, it is available for both Mac and Windows. Of course you can use your favorite image writing tool as well.
This install and initial setup is down with a local keyboard and display. once you are set up with the OS, you can switch to your favorite SSH client.
I set the BIOS on my embedded PC to defaults, and the OS type to LINUX. This step will vary depending on the hardware that you install on.
Once booted to the live USB, I did a pretty vanilla install of Ubuntu server. It is worth noting that I needed to have a network connection for the install, or my networking didn’t seem to work right after, so you may need to make sure you have an active network connection. I just did a basic install without any extra software, and with OpenSSH installed. Set your user name, computer name, short name, and password, and let it do it’s thing.
After the OS installation was complete, a reboot brings you into the command prompt. As with any new install, I recommend doing a quick update check and install any updates (this code will update your package list and install any available upgrades):
sudo apt update && sudo apt upgrade -yI also recommend installing net-tools so that you can use commands like ifconfig to get your IP address:
sudo apt install net-toolsAt this point, it is a pretty good idea to reboot your computer. I mean, you just did updates and install new software, so it can’t hurt.
sudo rebootAt this point, you can switch to connecting to your machine via SSH from your favorite SSH client. On a mac, you can just use Terminal. On windows, use a program like PuTTy. Of course, you can also continue to work locally on the machine as well. I just like working in an SSH client because I can keep the client side-by-side with the guide, and I can copy and paste all the commands rather than typing them out!
Installing OctoPrint
Once your computer reboots, it is time to start getting ready for the actual OctoPrint install. While Ubuntu 20.04 does come with Python 3, you still need a few other bits for everything to work right. You could do this before the reboot above if you wanted. You can install the needed components with the following command:
sudo apt-get install python3-pip python3-dev python3-setuptools python3-virtualenv git libyaml-dev build-essentialNow we have to set up the Python virtual environment in the correct directories. For now you should be in your user home directory “/home/[USER]” or the “~” directory. If you are not then just:
cd ~You can check the absolute path to the current directory with:
pwdSo, we need to make the OctoPrint directory and get into it:
mkdir OctoPrint && cd OctoPrintNext we are going to setup the virtual environment running Python 3:
virtualenv --python=python3 venvNow we are going to activate the virtual environment:
source venv/bin/activateOnce you do this step, your command line should be preceded by “(venv)” This indicates that you are working in the virtual environment, which is what we want.
Then we are going to install the latest version of PIP:
pip install pip --upgradeNext we are going to use PIP to install OctoPrint. This will download the necessary files from the OctoPrint repository and set it up in the virtual environment.
pip install https://get.octoprint.org/latestOnce the install is completed, we need to make sure that your user is a member of the tty and dialout groups in the system. This makes sure that OctoPrint can use serial connections to talk to your printer! Remember to use your user name, not mine!
sudo usermod -a -G tty alex
sudo usermod -a -G dialout alex
Now you should have OctoPrint installed and ready to use. You can test it by issuing the following command:
~/OctoPrint/venv/bin/octoprint serveWhen you use the above command, you will see the server start to run. If you open a web browser and point it at the IP address of your OctoPrint device and port 5000, you should see the OctoPrint Setup screen! For me, for this device i used: http://192.168.0.153:5000. Your IP address will depend on your network settings.
You can go through the setup now, if you would like, but I did it later. Back in your terminal, lets stop the server. This can be done by pressing control-c. This will terminate the server process and return you to a command line.
Automating OctoPrint Startup
Now that we have OctoPrint installed and working, it is time to set it up so that it will start automatically when the computer boots up. Fortunately, there are sample scripts available from the OctoPrint GitHub. All we have to do is download them and update them to match our install. We are going to download the scripts and move them to the correct locations. We also need to make sure that they are executable.
wget https://github.com/foosel/OctoPrint/raw/master/scripts/octoprint.init && sudo mv octoprint.init /etc/init.d/octoprint

wget https://github.com/foosel/OctoPrint/raw/master/scripts/octoprint.default && sudo mv octoprint.default /etc/default/octoprint

sudo chmod +x /etc/init.d/octoprint
You can check that your script is executable by listing the contents of /etc/init.d. If the script shows up in green, it is executable.
ls /etc/init.dNow we need to tweak the scripts to match our installation. This means that we need to uncomment a couple lines in the script and make sure that the user name and file paths are correct. See the example below, just replace my username with yours. Edit the script using nano.
sudo nano /etc/default/octoprintYour script should look something like this:
# Configuration for /etc/init.d/octoprint

# The init.d script will only run if this variable non-empty.
OCTOPRINT_USER=alex

# base directory to use
BASEDIR=/home/alex/.octoprint

# configuration file to use
CONFIGFILE=/home/alex/.octoprint/config.yaml

# On what port to run daemon, default is 5000
PORT=5000

# Path to the OctoPrint executable, you need to set this to match your installation!
DAEMON=/home/alex/OctoPrint/venv/bin/octoprint

# What arguments to pass to octoprint, usually no need to touch this
DAEMON_ARGS="--port=$PORT"

# Umask of files octoprint generates, Change this to 000 if running octoprint as its own, separate user
UMASK=022

# Process priority, 0 here will result in a priority 20 process.
# -2 ensures Octoprint has a slight priority over user processes.
NICELEVEL=-2

# Should we run at startup?
START=yes
Now we have to add our scripts to autostart. This is done with the following command:
sudo update-rc.d octoprint defaultsNow you should be able to run OctoPrint as a service using the following command:
sudo service octoprint startYou can check if OctoPrint is running by using this command (or visiting the site in a browser):
sudo service octoprint statusWe have one last thing to do in order to give the OctoPrint UI the ability to shutown or reboot the computer as well as the ability to restart the OctoPrint service. We will give our user the ability to run a couple sudo commands without requiring a password. We are going to create a simple file in sudoers.d that grants permissions. This is a little safer than directly editing your sudoers file. You can do this with nano, but it will not check your syntax like vi does. I personally like nano better, but make sure your get the syntax right or you might end up locking yourself out of being able to run sudo commands completely. (it is possible to recover from that if you do it…)
First, let’s open a new document in your favorite editor:
sudo nano /etc/sudoers.d/octoprint-shutdownThen in that document we will put the following:
alex ALL=NOPASSWD: /sbin/shutdown
alex ALL=NOPASSWD: /bin/systemctl restart octoprint.service
Save and close when you are done. As always, make sure that you use your user name or this will not do much for you.
Run OctoPrint on port 80
Now that we have OctoPrint up and running and starting on boot, assuming that OctoPrint is the only web service that you are running, we can make it default to port 80 (the standard http port) so that you don’t have to enter the port number in the URL when you want to access it. We do this with haproxy.
First we need to install haproxy:
sudo apt install haproxyNext we will make a backup copy of the haproxy config file and delete the original. We are just going to replace it with our own later:
sudo cp /etc/haproxy/haproxy.cfg /etc/haproxy/haproxy.cfg_old
sudo rm /etc/haproxy/haproxy.cfg
Next, open up an editor to make a new config file:
sudo nano /etc/haproxy/haproxy.cfgPaste the following into the haproxy.cfg file:
global
        maxconn 4096
        user haproxy
        group haproxy
        daemon
        log 127.0.0.1 local0 debug

defaults
        log     global
        mode    http
        option  httplog
        option  dontlognull
        retries 3
        option redispatch
        option http-server-close
        option forwardfor
        maxconn 2000
        timeout connect 5s
        timeout client  15min
        timeout server  15min

frontend public
        bind :::80 v4v6
        use_backend webcam if { path_beg /webcam/ }
        default_backend octoprint

backend octoprint
        reqrep ^([^\ :]*)\ /(.*)     \1\ /\2
        option forwardfor
        server octoprint1 127.0.0.1:5000

backend webcam
        reqrep ^([^\ :]*)\ /webcam/(.*)     \1\ /\2
        server webcam1  127.0.0.1:8080
Next we will enable haproxy. We are just adding “ENABLE=1” to the last line of the file. So open the file:
sudo nano /etc/default/haproxyThen make sure that your file looks like this:
# Defaults file for HAProxy
#
# This is sourced by both, the initscript and the systemd unit file, so do not
# treat it as a shell script fragment.

# Change the config file location if needed
#CONFIG="/etc/haproxy/haproxy.cfg"

# Add extra flags here, see haproxy(1) for a few options
#EXTRAOPTS="-de -m 16"
ENABLE=1
You then should restart haproxy to make sure that all changes take effect:
sudo service haproxy restartOf course you can check if haproxy is running using the command below, or you can just try to visit the URL of your server without the port number on the end.
sudo service haproxy statusSetup the WebCam Software
Now we all know that making timelapses of 3D prints is awesome, and one of the great features of OctoPrint is its webcam integration. Let’s get that working now too.
First off, change back to your home directory and then we need to install a handful of software:
cd ~
sudo apt install subversion libjpeg8-dev imagemagick ffmpeg libv4l-dev cmake
When you install those packages, there will be a lot of other dependancies that get installed with them. You do want it all.
Next we will grab mjpg-streamer from github and move into its directory:
git clone https://github.com/jacksonliam/mjpg-streamer.git
cd mjpg-streamer/mjpg-streamer-experimental
Now we have to export the library and make the software (these steps may take some time):
export LD_LIBRARY_PATH=.
make
Once the make is complete, we can test the software:
sudo ./mjpg_streamer -i "./input_uvc.so" -o "./output_http.so"Of course we want the webcam software to start automatically as well, so we need to make a couple more scripts to do this. We are going to make a scripts folder in your home folder and then create a script called “webcam.” As always, make sure to change the user name to match yours! DO NOT USE sudo when executing these commands.
cd ~
mkdir scripts
nano /home/alex/scripts/webcam
Go ahead and paste this script into the editor, remember to change user names!
#!/bin/bash
# Start / stop streamer daemon

case "$1" in
    start)
        /home/alex/scripts/webcamDaemon >/dev/null 2>&1 &
        echo "$0: started"
        ;;
    stop)
        pkill -x webcamDaemon
        pkill -x mjpg_streamer
        echo "$0: stopped"
        ;;
    *)
        echo "Usage: $0 {start|stop}" >&2
        ;;
esac
Now create a second script “webcamDaemon” (note again, not using sudo):
nano /home/alex/scripts/webcamDaemonAnd paste the following into the editor, updating for your user. You can also change the default video resolution and framerate in this script:
#!/bin/bash

MJPGSTREAMER_HOME=/home/alex/mjpg-streamer/mjpg-streamer-experimental
MJPGSTREAMER_INPUT_USB="input_uvc.so"
MJPGSTREAMER_INPUT_RASPICAM="input_raspicam.so"

# init configuration
camera="auto"
camera_usb_options="-r 640x480 -f 10"
camera_raspi_options="-fps 10"

if [ -e "/boot/octopi.txt" ]; then
    source "/boot/octopi.txt"
fi

# runs MJPG Streamer, using the provided input plugin + configuration
function runMjpgStreamer {
    input=$1
    pushd $MJPGSTREAMER_HOME
    echo Running ./mjpg_streamer -o "output_http.so -w ./www" -i "$input"
    LD_LIBRARY_PATH=. ./mjpg_streamer -o "output_http.so -w ./www" -i "$input"
    popd
}

# starts up the RasPiCam
function startRaspi {
    logger "Starting Raspberry Pi camera"
    runMjpgStreamer "$MJPGSTREAMER_INPUT_RASPICAM $camera_raspi_options"
}

# starts up the USB webcam
function startUsb {
    logger "Starting USB webcam"
    runMjpgStreamer "$MJPGSTREAMER_INPUT_USB $camera_usb_options"
}

# we need this to prevent the later calls to vcgencmd from blocking
# I have no idea why, but that's how it is...
vcgencmd version

# echo configuration
echo camera: $camera
echo usb options: $camera_usb_options
echo raspi options: $camera_raspi_options

# keep mjpg streamer running if some camera is attached
while true; do
    if [ -e "/dev/video0" ] && { [ "$camera" = "auto" ] || [ "$camera" = "usb" ] ; }; then
        startUsb
    elif [ "`vcgencmd get_camera`" = "supported=1 detected=1" ] && { [ "$camera" = "auto" ] || [ "$camera" = "raspi" ] ; }; then
        startRaspi
    fi

    sleep 120
done
We now have to make these scripts executable, so run the following commands (update for your user):
sudo chmod +x /home/alex/scripts/webcam
sudo chmod +x /home/alex/scripts/webcamDaemon
To get the webcam to start on reboot, we are going to make an rc.local file. This will just execute the camera startup script. Create the file using nano:
sudo nano /etc/rc.localThen paste this simple script into it (change user names):
#!/bin/sh -e
#
# rc.local
#
# This script is executed at the end of each multiuser runlevel.
# Make sure that the script will "" on success or any other
# value on error.
#
# In order to enable or disable this script just change the execution
# bits.
#
# By default this script does nothing.

/home/alex/scripts/webcam start

exit 0
Now we need to make rc.local executable:
sudo chmod +x /etc/rc.localFinally, we can start the webcam (change user names):
sudo /home/alex/scripts/webcam startUse a URL not IP address
If you want a clean way to access your OctoPrint server so that you don’t have to remember the IP address of it, we can do that with Avahi (aka Bonjour). First, we need to install Avahi:
sudo apt install avahi-daemonThen we are going to create a file with the hostname that we would like to use:
sudo nano /etc/hostnameIn the editor, just type the hostname you want on the first line. then save and exit. Mine is “icewolf3d”
Then we need to edit the hosts file to use that host name. You need to either include the hostname on the line for 127.0.1.1 or add a line. My hosts file looks like this:
127.0.0.1 localhost
127.0.1.1 icewolf-3dsrv icewolf3d

# The following lines are desirable for IPv6 capable hosts
::1     ip6-localhost ip6-loopback
fe00::0 ip6-localnet
ff00::0 ip6-mcastprefix
ff02::1 ip6-allnodes
ff02::2 ip6-allrouters
Lastly, it is time to reboot the system:
sudo reboot nowConfiguring OctoPrint
I am not going to go into too much detail on how to set up OctoPrint as it is pretty straight forward, and a little different depending on your printer. However, there are a couple things that are useful. Once you go through the initial setup you may need to fill in the following information:
Shutdown commands (I don’t actually use the shutdown command as my system is not designed for that):
Restart OctoPrint: sudo /bin/systemctl restart octoprint.service
Restart System: sudo shutdown -r now
Shutdown System: sudo shutdown -h now
Webcam links:
Stream URL: /webcam/?action=stream
Snapshot URL: http://127.0.0.1:8080/?action=snapshot
Path to FFMPEG: /usr/bin/ffmpeg
Onward Ever Upward…
…oh faithful followers of Waldo!
At this point you should have a functional install of OctoPrint that starts on boot and is web-cam ready. Since this runs in Python 3, not all plugins are compatible yet, but many are. I definitely recommend the OctoPod plugin along with the iOS app (I think there is an Android one as well). It gives you all the great functionality of OctoPrint in an app along with notifications.
My next plans for this system are to get it connected to my NAS for storage of timelapse videos as well as my gcode repository. The HDD of the server is plenty big for it all, but it seems like it would be convenient if I got it all in one place and easily accessible anywhere on my network.
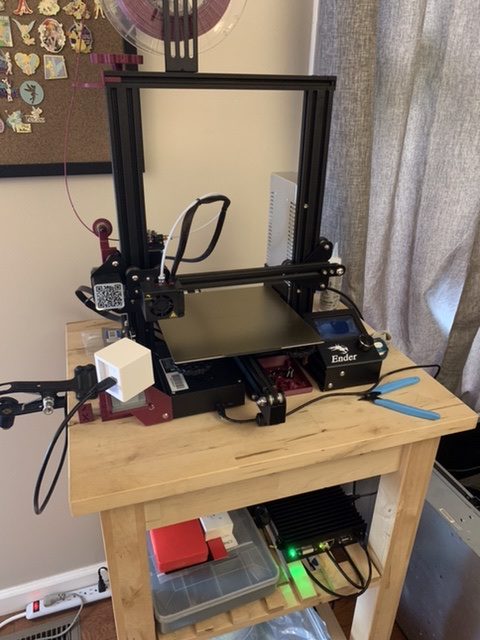
My printer setup now
Resources
I used the following sources to aid in this journey. Credit where credit is due:
- Octoprint On Linux – Install – How To – Chris’s Basement (youtube)
- How to install octoprint 1.4.0 with python 3 (OctoPrint Community Forum)
- Pine64 & OctoPrint by Michael Greene (I originally thought I would use my Pine64 but couldn’t find it… Also not a huge fan of this method)
- Cookbook: System Commands (from the octoprint github)
Leave a Reply